The upper hallway got a pretty two tiered chandelier. The mini people are gonna be banging their heads all the time but I love how delicate it looks.
The bathroom also got a pretty little chandelier for over the tub. I think I want one now, too. :-)
Have a wonderful day!
Showing posts with label chandelier. Show all posts
Tuesday, January 27, 2015
Saturday, January 24, 2015
I Thought I Was Happy
Anyone who has followed my blog for any length of time knows that sometimes it takes a few "improvements" before I am satisfied with the results. The living room chandelier was one of those times. I didn't dislike it before but it wasn't quite right. I started with the collar at the top (and this is the 3rd edition collar, lol) and then decided it needed some bling. Adding the bling would have been much less challenging if I'd decided on that path before the chandelier was fixed to the ceiling. But with some twists and turns and other maneuvers I managed to get the crystals attached. I think it's an improvement. What do you think?
Back soon with some exterior ideas...
A Very Enlightening Afternoon
At least in the mini world - although none of them are working lights. I reworked the bedroom chandelier and I am much happier with it. The four arms are spaced the way I want them and the swags of beads sparkle beautifully when the light hits them.
I actually made the bathroom sconces when I first made the chandelier but forgot to post a photo. These were made with various jewelry and scrapbook findings and beads.
The revamped console and end table are not lights but that's coming later in this post. I gave both pieces a more worn and rustic finish, leaving the tops of each in the original wood finish. I'm especially happy with the console. It's a much nicer looking piece now.
The beautiful potted roses were made by my friend, Brenda. The worn finish of the pot is perfect for this room. I also rearranged again. I'm still working to find just the right layout. This may be the one.
The living room light fixture was made from an odd piece of something that my son found in our driveway. I like the egg basket effect of the wire mesh. The bottom loops, with a little help, fold out just a bit to give it a floral feel.
Once the front door is on, this room is nearly finished. I want some sort of coffee table but I don't know just what yet.
At some point I really have to address the outside of this house. I'm closer to knowing what I want anyway. At least I am making progress. ;-)
We have our first victim to the nasty stomach bug going around here. My poor daughter (and I, as caregiver) spent a horrible night sleeping on the bathroom floor. If we have another victim, it will be me. Fingers crossed that we won't pass it around.
Hoping you have a blessed (and much healthier) weekend wherever you are.
Labels:
$8 dollhouse,
bathroom,
beamed ceiling,
bedroom,
chandelier,
console,
French country,
refinished,
side table,
toile
Friday, January 9, 2015
Snow Day #2 - And this time there's snow!
I know because I've trudged through several inches of it to do chores twice today. Brrr - it's as cold as it was yesterday, too. But it sure is pretty with the sun shining on it.
I ended up alone today so I spent some time on the French Country house.
First up was the chandelier for the master bedroom. It looks so pretty with the vaulted ceiling. The wicker cradle was a gift from a friend several years ago. I want to get a resin couple from HBS to be the parents and I love the pregnant young woman. With the toddler upstairs, the new baby will be in mom and dad's room at first.
Speaking of the toddler's room, it got some new things, too. I raided a nursery room box to find these goodies. The blocks are just beads but many of the other items were made by miniature friends. I made the afghan on the bed.
I made pendant lights for over the dining table and the island. They are fairly simple but I'm happy with the results. The lights are similar enough to look good in the same room without being identical. The rooster on top of the range hood was a lucky find. I'm not sure where he came from but was part of an earring. The rest of the earring gave me the unique light hardware for the island light.
I also made a greasy skillet since they are having burgers for lunch. The pan was made with a makeup tray, a paper fastener, black beads, and a bit of beading wire. The "grease" is amber Gallery Glass paint.
This house is progressing slowly but surely. Soon I need to make some decisions about the exterior. I think I have a plan but I'm not 100% sure yet. At the rate I'm going with this house, I'll have plenty of time to decide, lol.
Have a wonderful and blessing filled weekend, my friends!
Labels:
$8 dollhouse,
chandelier,
French country,
nursery swap,
snow day
Wednesday, September 1, 2010
A bit more progress on the saloon
You're all gonna laugh at me but I'm enjoying taking this project a bit more slowly than I usually work. (See you're all laughing now because you don't think I am working slowly. :) ) Normally by this stage in a project I'd just plow through and finish the construction but I'm just working on a few details at a time. This afternoon I played with the chandeliers I bought earlier and I put up the border and baseboard in the lower level. I don't have any regular dollhouse baseboard right now so I just used skinny sticks so I could even the bottom edges. To be truly accurate I would need much taller base trim but I'm using what I have.
Also, I didn't show you a pic of the ceiling yesterday. Here it is complete with the new lighting. I used embossed scrapbook paper and painted it antique copper and then dry brushed bright bronze over the top. It looks very elegant and just right with the wallpaper.Each of the chandeliers had some problem. One has been badly repaired and the other was missing the bottom trim. I added some beads to the base of the one missing the trim and then I painted both chandeliers with sterling silver paint. I added bead globes to both and hung them from eye hooks in the ceiling. They aren't an exact match but the paint kind of disguises that.
I also made a coordinating table lamp for the top of the piano. Late last night I added a floral embossed button to the center of the back bar trim. It needed just a little something. It's all really coming together!
Wednesday, April 29, 2009
What a difference a little paint can make!
I spent a little time last night on some of the lights I've been making for the new dollhouse. The little metal connector doodads I found for the bathroom sconces are really cool but I added some red glass paint to the shade area and I really like it. Now they look like red glass shades. I even glued clear glass bead "bulbs" inside the sconces so they are good to go. :0)
I also added some paint to the living room chandelier - I painted the bea
d candles cream and the ivory bead at the top of the chandelier, gold. I'm much happier with it now.
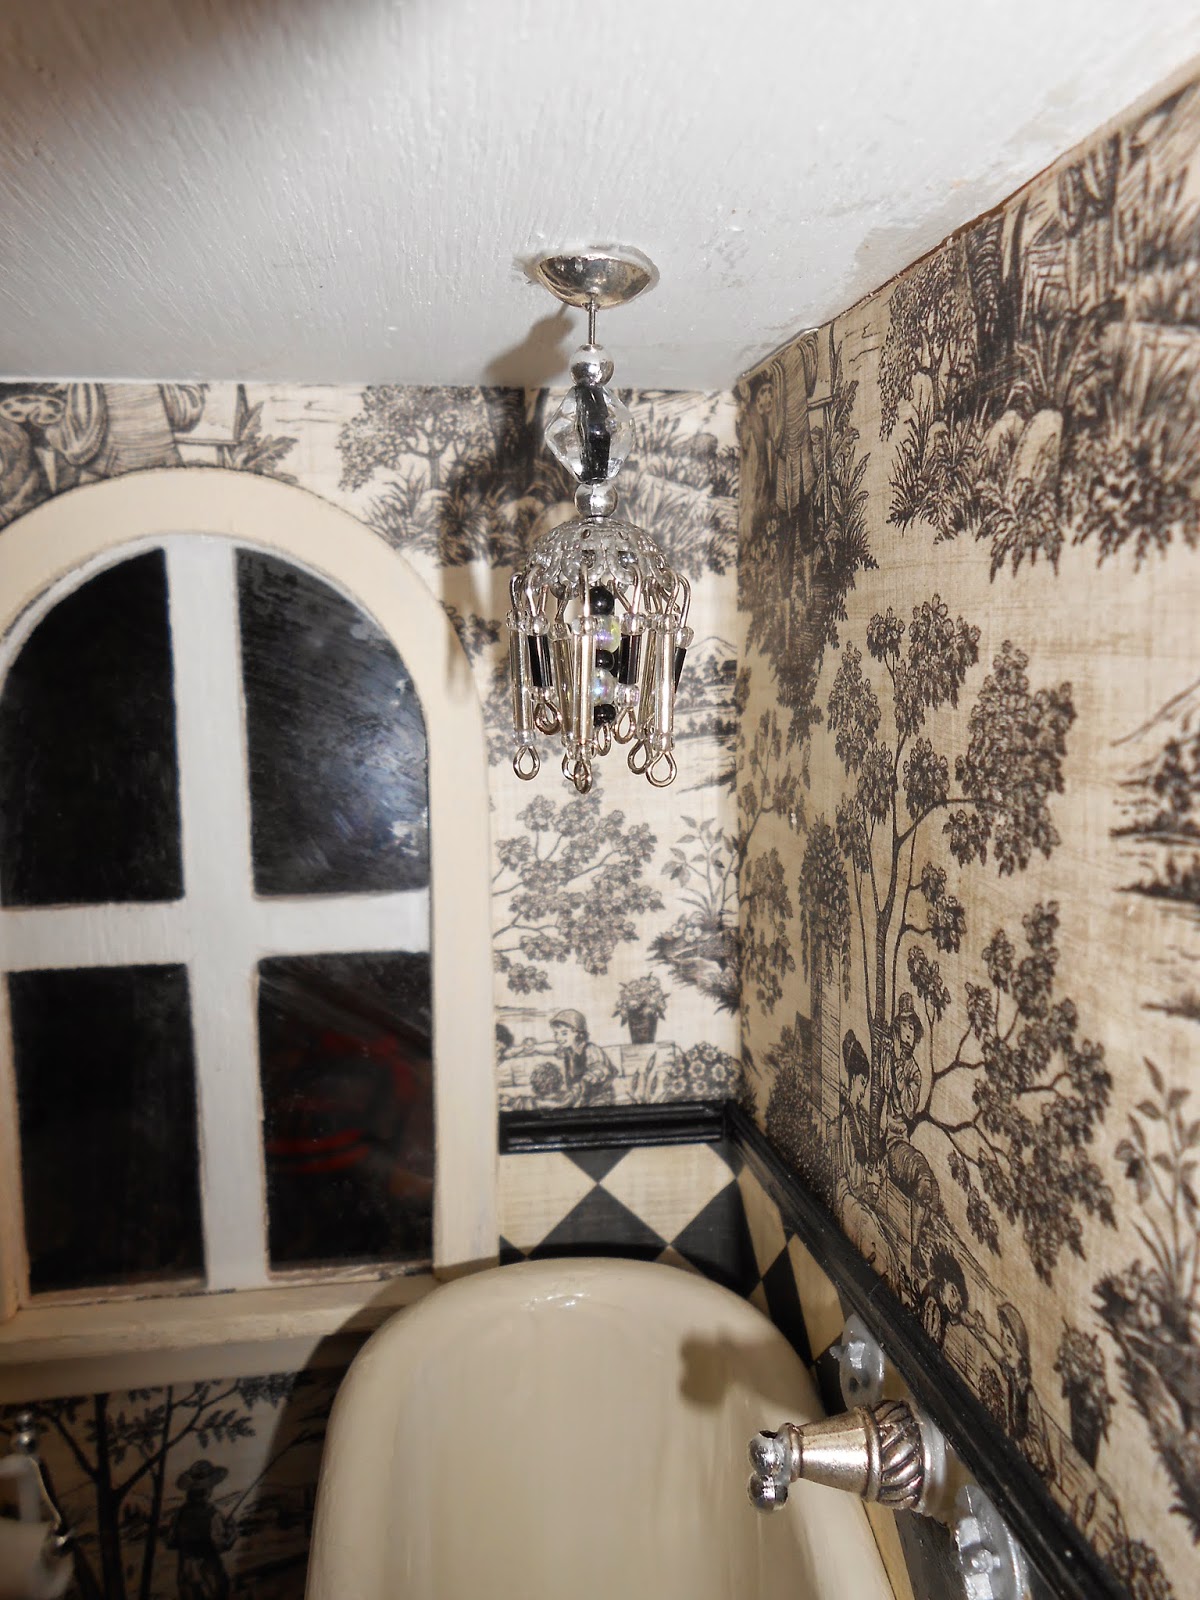
Monday, April 27, 2009
Another chandelier
Sunday, April 26, 2009
My chandelier using Casey's tutorial

I used Casey's tutorial to make this smaller version of her chandelier. I really like it. I found a round brass mounting bracket that I've painted silver to match. I'm planning to use it as a ceiling rose.
This was the clearest photo I could get. It doesn't show all of the details but you get the idea. :-)
Subscribe to:
Comments (Atom)
