Showing posts with label bedroom. Show all posts

Monday, January 25, 2016

Teacher In Service Day...

...is a lovely thing when you are an instructional assistant rather than a teacher. I got the day off so I conquered some of the household chores and spent time making the inside of the Westville look lived in. I know, I know, I said I'd work on the exterior today. There were just too many other fun things demanding my attention so the fun things won. ;-)
Pie from my friend, Brenda, recipes from pinterest, and I made the recipe box.

I made the lamps last night. Today I made books and the alarm clock. The drinking glass part of a pencil from the dollar store.

A closer view of the alarm clock - made from a hearing aid battery and a scrap of  wood.

 The living room looks a bit more lived in, too.
 Until I can find just the right cat, the scotty dog will fill the spot on the television.
 Looks like it's game night at the Sherwoods. No wonder Davy is so excited to see Dad. The Monopoly game came from a printie I found on Pinterest.The Lone Ranger game was made from a photo of the vintage game. It doesn't open.
I found some of the things I'd purchased for Davy's room. The cowboy boots are buttons. The little blue house is from a Monopoly game. The fishing pole has been in my stash forever. The baseball, glove and bat were purchased for this project. I used permanent markers to spruce up the car and cannon game pieces. I still want to make a shelf for this room.

There is still room for more things to make this house look lived in but I'm running out of excuses to get started on the exterior. Hmmm, maybe I'll make that shelf now...

Saturday, January 23, 2016

It's starting to look like home

 Thank goodness for curved manicure scissors! I wouldn't have been able to cut the flying ducks out with my regular craft scissors. You can't tell in the photo but I embossed them to give them some dimension on the wall.
 While Davy and the dog greet Dad at the door, we can just see the new art piece on the wall to the right of the bay window.
 Mrs. Sherwood is dabbling in a bit of modern (mid century modern, anyway) art. She's not too sure about it even though the colors go beautifully with the rest of the room. That's why it's hidden a bit from the first view of the room. Of course, that lamp is going to highlight the piece but we won't point that out to her. I really like it. ;-)
The bedroom picture is of flying sea birds. The pinks and blues look nice in this room.

There's still a lot to do inside and I haven't really done much with the exterior. Monday is a teacher in-service day at school so I get a day off. Yay for play days! I hope to make some major progress. I love working on a new project but I'd like to have my dining room table back again. Fingers crossed for a productive Monday.

Thursday, January 21, 2016

It's the Little Things

 The kitchen now has curtains and a few more small details.
 Mrs. Sherwood's ginormous pie is really starting to bother me. If I grind out the bowl with my Dremel what would be better in such a large bowl? I'm not sure I can get the inside smooth enough to make it just an empty bowl. Ideas?
 I made a brief visit to Hobby Lobby today and found a few more pantry items. It's full enough to seem like a real pantry but I still have room if I want to add something later.
 The last project for this evening was these nightstands for the master bedroom. I still need to seal them but I'll wait until the glue is completely dry.
I think they look good in the room.They will look better with lamps, books, alarm clock, etc. Slow and steady wins the race, right?

Thursday, January 14, 2016

While Hubby's Away, I Get to Play...With the Dollhouse

 Today was very productive, at least in the Sherwood house. (I did go to work then come home and run and unload the real dishwasher and make dinner so all was not lost in the real world, lol.) Sometime last summer my husband found some nice sized pieces of very thin tree bark that he thought I might be able to use. I chopped them into nice plank size using my paper cutter. I glued them in place and weighted them down with cookbooks while they dried. Then I sanded them down and put a light coat of matte Mod Podge on the floor to seal it. It looks great! I also finished the hall window - although what possessed me to wait until all the walls were in place before putting the trim on, I'll never know. I'm glad my hands aren't any larger or the window would just be trim less.
 The master bedroom may be my favorite so far. My carpet piece wasn't quite large enough to cover the entire lumpy floor so I laid more of my plank flooring around the outer edge of the floor and fastened the carpet down in the middle. No more ugly zebra felt! I am changing out the windows as I go. The ones original to the house were in really bad shape. These look a bit more contemporary as if the Sherwoods replaced all the windows as they redecorated their home. This room has the new windows and trim and all the baseboard in. I need to make nightstands and then add artwork and accessories so it looks like they really live here. The decor is fairly traditional except for the colors and bedroom set. I'm very happy with the drapes and cornice.

I got a start on the kitchen, too. The pantry shelves are in place and I did some work on the stairs. No pictures of that yet because it's still really ugly. I have to think on that problem some more. At least I have the gaps filled and the steps no longer move. That's progress, I guess.

Hubby has quartet practice tomorrow evening so I will have time to work on the kitchen. I'm still pondering about the living room. The interior is coming together very nicely. I hope I'm as happy with my brick exterior as I am so far with the inside. Fingers crossed!

Stay tuned for more progress.

Saturday, November 21, 2015

It's the little things

 I pried the mirror out of a broken makeup compact this morning. It was the perfect size for the dresser. I mounted it to the dresser so I can rearrange if I want - besides the fact that I haven't started the actual house renovations yet. The zebra carpet has to go.
I made a couple of adjustments to the chair and made a matching ottoman. With this layout I can fit another chair. I need more of the turquoise felt. I think the second chair should be the same style as the sofa. That's the current plan, anyway.

We are in the midst of the first winter storm of the season. We had seven inches of snow an hour or so ago and it's still falling steadily. Hubby and I are enjoying hot drinks and homemade donuts. Yum! We are snug and warm in our home while the beautiful snow falls outside. Life is good and we are blessed.


Thursday, November 19, 2015

Mid Century Modern Fun

 I found this set while looking for inspiration for the master bedroom set. The staggered pulls make it really unusual and interesting. This was the starting point for my mini bedroom set.
 I haven't made nightstands yet and I went with a simple headboard but here are the pieces in the master bedroom - The previous young owner's taste just doesn't quite work, does it? LOL
Here are the pieces in front of the paper that will be in the bedroom. The blonde wood pieces stand out nicely against the stripes. The bedspread is made from the same fabric that Harriet in the boarding house has on her bed. I really like the mini pom pom trim on this one. It really looks like a chenille bedspread!

I'm working my way through the furnishings. After the nightstands I'll be moving on to the living room. Stay tuned....

Saturday, January 24, 2015

A Very Enlightening Afternoon

 At least in the mini world - although none of them are working lights. I reworked the bedroom chandelier and I am much happier with it. The four arms are spaced the way I want them and the swags of beads sparkle beautifully when the light hits them.

I actually made the bathroom sconces when I first made the chandelier but forgot to post a photo. These were made with various jewelry and scrapbook findings and beads.
 The revamped console and end table are not lights but that's coming later in this post. I gave both pieces a more worn and rustic finish, leaving the tops of each in the original wood finish. I'm especially happy with the console. It's a much nicer looking piece now.
 The beautiful potted roses were made by my friend, Brenda. The worn finish of the pot is perfect for this room. I also rearranged again. I'm still working to find just the right layout. This may be the one.
 The living room light fixture was made from an odd piece of something that my son found in our driveway. I like the egg basket effect of the wire mesh. The bottom loops, with a little help, fold out just a bit to give it a floral feel.

Once the front door is on, this room is nearly finished. I want some sort of coffee table but I don't know just what yet.

At some point I really have to address the outside of this house. I'm closer to knowing what I want anyway. At least I am making progress. ;-)

We have our first victim to the nasty stomach bug going around here. My poor daughter (and I, as caregiver) spent a horrible night sleeping on the bathroom floor. If we have another victim, it will be me. Fingers crossed that we won't pass it around.

Hoping you have a blessed (and much healthier) weekend wherever you are.

Friday, August 8, 2014

I like it!

 The nightstand is across the room rather than by the bed but I am happy with the room. I love the beamed ceiling. I decided to stain the floor to match the beams to tie it all together. The bed canopy hides the fact that the headboard doesn't go all the way to the floor. I guess I could have just put legs on the headboard to make it look finished but the canopy suits the rustic meets romance feel of the room.
Update: I adjusted the pleats and gathers and added a piece of paper doily as the centerpiece on the canopy frame. I like the little added touches. The bedroom is beginning to look like I had hoped it would. It needs accessorizing but it already looks cozy and romantic. :-)

Saturday, August 2, 2014

It's a date!

 My wonderful husband and I had a date today. We explored some of our favorite antique/vintage shops and had dinner. One of my finds was this two door console table. I don't know if it will fit under the stairs but that's my hope.
 I also found fabric for the master bedroom. The "sort of toile like" floral fabric and the sheet fabric were purchased today. I made the upholstered headboard from balsa and fun foam and tufted it. The bed itself is two layers of styrofoam. I am a bit disappointed in the layout of the bedroom. There is no good place for a double bed. This is the best option and I have blocked the French doors. I may turn the doors into a large arched window or leave them as doors that open out so they are still usable from the back side of the bed. In either case, I plan to make full length drapes that hang to the sides of the doors.
 Here's a closer view of the tufting and the different fabrics I used.
An overall view - my current plan is to make the ceiling beamed since I have all that upward space. Too bad I can't convert a bit of that to usable wall and floor space. ;-)

Thursday, July 24, 2014

Sometimes a dollhouse has other plans

...than the ones you have. This time it was the bathroom. It doesn't look anything like the original idea I had. I like this so much better. The first project was to get that wall between the hall and bathroom in. Then I could get to the fun part. I really didn't know what I would use the toile scrapbook paper for when I purchased it. I think it looks great in the bathroom. The blue towels help to carry some color over from the master bedroom. I ended up painting the outside of the tub because it reflected all the patterns in the room. I really like the black. The tub still needs plumbing and I need to finish the windows, trim out the rest of the wall tiles, and glue the stone privacy wall in place.
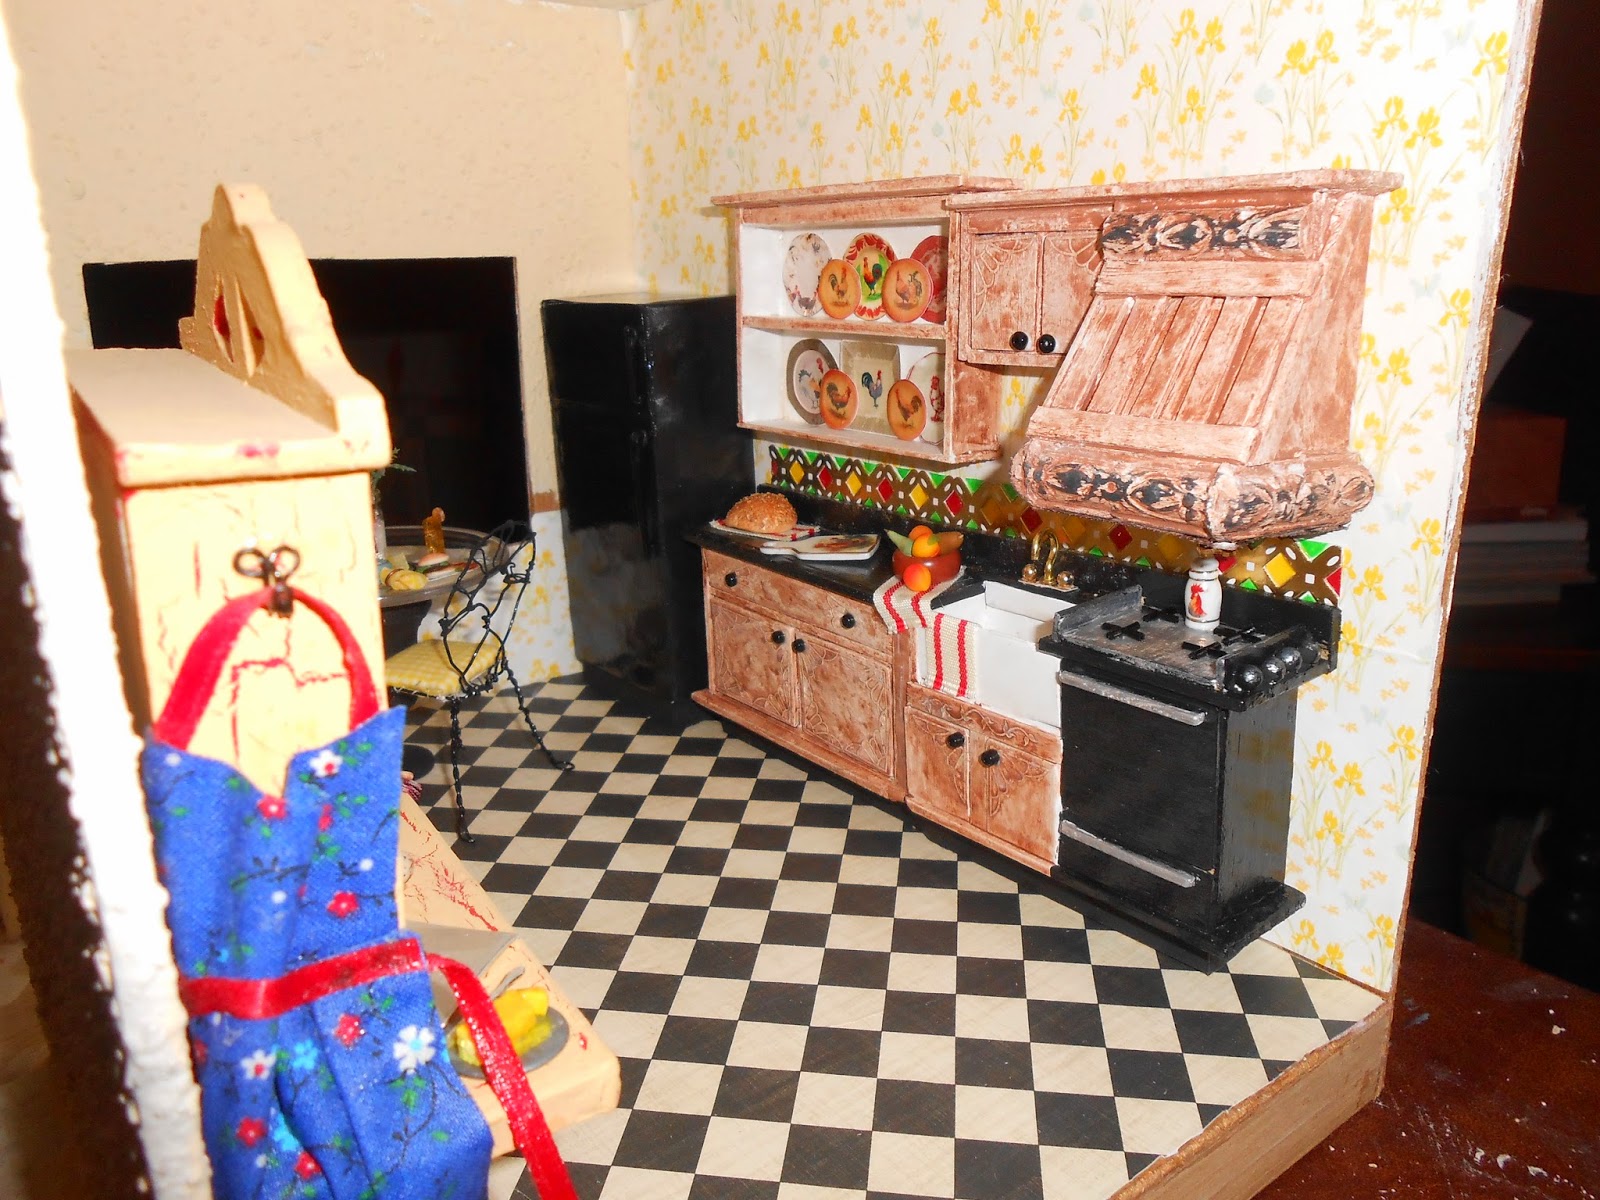
 The kitchen wallpaper and flooring are done. Once the bay window is finished I can put up the chair rail on the window and hutch walls. I finished the upper cabinets, complete with the range hood. That's another project I'm happy with. I had thought of doing a hammered copper hood but the sheet metal was not cooperating. The small cabinet over the sink and the range hood are both made from the top of a hutch that looks just like the plate shelf. I cut away the bottom shelf on the sink side and closed in the top to make a cabinet with doors. I left the back on the range side to help form the frame work for the hood.
The walllpaper is finished in the master bedroom, too. I just have to figure out what I want to do with the floor here and in the living room. I'm glad this is a fairly busy print because I had to do a lot of patching to have enough paper to cover the tall back wall.

Today was productive in the dollhouse and I got some needed chores done in my 1:1 house. Life is good!


Friday, July 18, 2014

I forgot how much fun it is!

 No change in the house tonight but I made big progress on furniture. The nightstand and armoire for the master bedroom - the wallpaper for that room is behind them. These took forever due to the multiple coats of paint I needed to get the effect I wanted.
 This wallpaper and border were already in the room. I really like them so I'm going to make this a baby girl's room. Her dresser turned out well, I think.
 The kitchen cupboards and appliances before painting - at this point they have a coat of gesso.
 The shelves on the counter next to the fridge will be mounted on the wall. The refrigerator is a paper covered block of balsa. The rest was made by bashing Michael's hutches.
 This is after the paint treatment for the cupboards. I still need to finish the appliances and countertops. The cabinets need knobs, too.

Farmhouse sink and range in the same unit. There's never quite enough space in a dollhouse kitchen but this works pretty well. I still need faucet, burners, and a finish of some sort on the stove. The kitchen is going to be primarily yellow with red and black accents. On the wall opposite the counter and appliances is going to be a baking day hutch from my zibbet shop. The window is a bay and I plan to have a small dining area there.