The 1:12 scale sofa is a traditional style with exposed wooden legs. The fabric is a pretty green and white fruit stripe. There is also a pillar candle on a gold pedestal stand for the coffee table. It wasn't dry and I couldn't wait to take the photo, lol.
The 1:24 scale sofa is also traditionally styled with bun feet and a fringed skirt. The mini checked fabric is burgundy and white. The pillows and afghan are attached. The white pillar candle rests in a silver holder.
Both coffee tables have hand carved legs. The pillar candles both look as though they have been burned with a blackened wick and drips of wax. All items were completely handcrafted by me.
Best of luck!
Monday, February 28, 2011
Let's Celebrate!
I promised a give away for my 2nd blog anniversary. I've also now reached nearly 250 followers. Woo hoo!
The prize is still a surprise but the rules for the give away are as follows:
1. You must be a follower of my blog as of February 28, 2011 - today.
2. You need to leave a comment on this post telling me whether you prefer 1:12 scale or 1:24 scale. The prize will be in the preferred scale of the winner.
That's it - simple rules. I will announce the winner on Monday, March 14th.
Good luck!
Friday, February 25, 2011
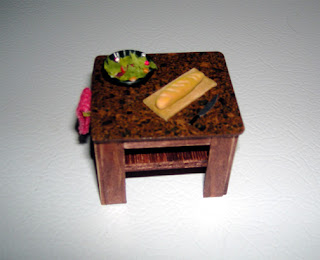
A bit of salad, anyone?
Thursday, February 24, 2011
Half scale items for my etsy shop
Wednesday, February 23, 2011
Finally the final photos
The bedroom and living room photos aren't the most updated - I can't find those photos. I changed the artwork over the bedroom bench to a large framed piece and added a wedding photo to the dresser. The living room has a few more items on the shelves including a framed photo and brackets to support the mantle.
Sunday, February 20, 2011
I'm still here
I haven't been posting because I've been down with the flu. I have managed to finish up the bungalow, though. It's getting its first public viewing tonight at our church talent night. I'll let you all know how that goes and post some new photos tomorrow.
I'd like to welcome all my recent followers, too. I will post links to your blogs/sites soon.
I hope you all have a healthy and safe week!
I'd like to welcome all my recent followers, too. I will post links to your blogs/sites soon.
I hope you all have a healthy and safe week!
Wednesday, February 16, 2011
Shingles are finished!
Tuesday, February 15, 2011
Big Changes!
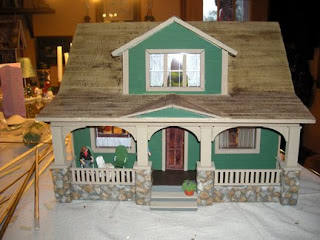
Last night was very productive - the porch, dormer and roof are all assembled. I have shingles and roof brackets and a bit of trim work to do on the exterior.
The bathroom is painted country tan like the exterior trim. It looks gray in the photo. This room needs towels, toilet paper, trash can, rugs, and lots of personal care products.
The bedroom is the brightest room in the house but not too overpowering. The walnut woodwork really contrasts beautifully with the paint. This room needs curtains and some personal accessories to make it look like Ben and Ally really live there.
The sewing room is a very pale green. I need to touch up the paint in the right corner, I see, ;). This is a very plain room. I think I need to do built in cupboards along the left wall.. or at least a large dresser or cabinet for Ally's supplies to be stored.
This is the rug I was originally planning to use in the dining area. I need to check out the site that Kathi suggested because I'm not entirely happy with this rug option. Thanks, Kathi! It also looks like I could put a small built in buffet or shelving unit on the right wall, extending from the cabinets. Something to consider...
Several of you have mentioned how quickly I'm working and I've been so proud of myself for slowing down, lol. The last half scale house I did took only a few days. If you count the time I spent working on furniture in addition to the build and decorate time I will have spent nearly a month on this project. I tend to have most of the details worked out in my head before I start so the projects tend to go quickly, barring too many unforeseen difficulties. I've had to correct several "user errors" as I go this time but the results are going to be just what I pictured in my head.
A note to anyone planning to build this kit - I have never had a new mdf kit with so much warping in the pieces. No matter how many squares I use to get perfect angles I just can't get it to completely cooperate. Since this is supposed to be an old house that's being restored I guess that isn't all bad. (I've never lived in an old house with perfectly square corners and walls, ;-) ) But it's still frustrating.
The bathroom is painted country tan like the exterior trim. It looks gray in the photo. This room needs towels, toilet paper, trash can, rugs, and lots of personal care products.
The bedroom is the brightest room in the house but not too overpowering. The walnut woodwork really contrasts beautifully with the paint. This room needs curtains and some personal accessories to make it look like Ben and Ally really live there.
The sewing room is a very pale green. I need to touch up the paint in the right corner, I see, ;). This is a very plain room. I think I need to do built in cupboards along the left wall.. or at least a large dresser or cabinet for Ally's supplies to be stored.
This is the rug I was originally planning to use in the dining area. I need to check out the site that Kathi suggested because I'm not entirely happy with this rug option. Thanks, Kathi! It also looks like I could put a small built in buffet or shelving unit on the right wall, extending from the cabinets. Something to consider...
Several of you have mentioned how quickly I'm working and I've been so proud of myself for slowing down, lol. The last half scale house I did took only a few days. If you count the time I spent working on furniture in addition to the build and decorate time I will have spent nearly a month on this project. I tend to have most of the details worked out in my head before I start so the projects tend to go quickly, barring too many unforeseen difficulties. I've had to correct several "user errors" as I go this time but the results are going to be just what I pictured in my head.
A note to anyone planning to build this kit - I have never had a new mdf kit with so much warping in the pieces. No matter how many squares I use to get perfect angles I just can't get it to completely cooperate. Since this is supposed to be an old house that's being restored I guess that isn't all bad. (I've never lived in an old house with perfectly square corners and walls, ;-) ) But it's still frustrating.
Monday, February 14, 2011
Still need to move up but....
I took time to put the ceiling paper and crown molding in the downstairs rooms. I also mounted the ceiling light fixtures. So that all meant I had to set the furniture up again. ;) I'm debating whether to use a rug under the table in the kitchen. I think it would add some color but I'm just not sure. I also don't know what type, if any, curtains to use on these windows. Suggestions?
The ceiling fan is just right for the living room. This room needs a doorknob and possibly curtains as well as more accessories for the bookcases but it's effectively finished. I love this room. I could quite happily live here. The colors are very much my personal style.
Here's a slightly more finished version of the porch. The arches are installed and the steps are in place. I think I need a porch swing or glider or at least a bench on the right side of the porch and a small table between the chairs on the left. They need someplace to put a glass of lemonade or iced tea. :) I also need a door knob for the door.
I really like the color combination (thank you, Kim, for saying the same thing!) The ivy green and country tan look really nice with the tan and gray stone. I'm trying to use colors found in nature. It's going to be a very peaceful looking decor.
Just a quick update
Sunday, February 13, 2011
Stained glass "windows"
Some things are easier to do in a smaller scale house when the ceiling is still off. One is accessorizing the built in bookcases. Another is hanging artwork and the faux windows. I found an appropriate Arts and Crafts style stained glass design online. I printed it out on transparencies and mounted the cut out images on mirrored poster board. I added mitered trim stained like the window trim and they look very much like the windows that should be on the fireplace wall.
Ben and Ally seem to be enjoying their living room so far. I guess they don't mind the missing front door and the glass in the window, lol. For that matter, they don't even have a ceiling yet. ;)
The desk area looks good, too. The doorway to the kitchen won't have a door. It's more of an archway.
Now that I've had some play time with the mini accessories it's time to get back to the actual construction. The next step on the instruction sheet is to finish the porch. I think I need to assemble, stain and install the front door and then get to the porch.
Back tomorrow with updated photos.
Ben and Ally seem to be enjoying their living room so far. I guess they don't mind the missing front door and the glass in the window, lol. For that matter, they don't even have a ceiling yet. ;)
The desk area looks good, too. The doorway to the kitchen won't have a door. It's more of an archway.
Now that I've had some play time with the mini accessories it's time to get back to the actual construction. The next step on the instruction sheet is to finish the porch. I think I need to assemble, stain and install the front door and then get to the porch.
Back tomorrow with updated photos.
Saturday, February 12, 2011
I did get the foundation finished
I got my daughter settled with some chicken soup, tea and cold/flu medications. Poor thing is really miserable. She's spending the weekend in bed. I did have a bit of time to finish up the foundation once I got home. I love how it turned out! The upper posts are not yet glued on. I just wanted to get an idea of how it will look. The small town my daughter's college is in has a lot of bungalows. I got some research on exteriors in today, too. :)
Someone on one of my forums asked about built ins in the bungalow. I found some photos online for inspiration and this is what I decided on. The bookcases give me lots of room for accessories to personalize the space and are authentic to the architecture of the house. I could have done benches or glass door cabinets or some combination and still been true to the style but I like the balance of the two identical bookcases.
Hubby has to work tomorrow after church which is no fun for him but it means I will have more mini time. Tomorrow I'll start on the upper story and maybe finish the front door. I'm thinking a deep red for the exterior. It would contrast nicely with the green siding and tan trim. Anyone have any other suggestions for door color? All suggestions will be considered before making the final decision.
Making sense of all the little bits
Now that I've actually started the build, the instructions make much more sense, lol. It looked very intimidating at first and I've built a lot of dollhouse kits. Assembling the rails was one of the more time consuming projects.
But they are now finished - they've had one more coat of paint since this photo was taken.
The porch column bases are assembled and painted, too. Today I'm working on the stonework for the bases and the foundation. It's going to look just like it did in my head! Always a plus. ;)
I mounted the wall cabinets while I could keep the walls flat. The wall color is a bit brighter yellow than it shows up here - soft yellow but not cream. The base cabinets and appliances are not glued in place. I just wanted to see how everything would look.
Making sure everything is square while it dries. After I work on the porch I need to tape the upper story together to mark paint lines.
Note: Just got a call from one of my daughters. She's really sick so I'm making a road trip to take meds and chicken soup. Guess the stone work will be tomorrow's project. Have a great day!
Friday, February 11, 2011
Shingles, shingles and more shingles
Did I mention shingles? There isn't much I like about doing shingles - except for looking at the finished roof, lol. These have now all been stained and are drying. At the top of the photo you can see the first coat of paint on the exterior pieces. The siding will be the green. The trim will be country tan and the post bases will be tan and gray stone.
The lower level interior walls have been painted. The kitchen will be "hope" yellow and the living room paint color is a custom mix of leaf green, hope yellow and antique white. The base coat is straight leaf green.
I used a sponge brush to give a plaster like texture to the paint.
Three pictures don't look like hours of work. The shingles took a very long time and the interior walls have 2-3 coats of paint.
I hope no one plans to eat at the dining room table for awhile, lol. I've taken over!
Thursday, February 10, 2011
It's here and only 1 day late for my birthday!
First the Fed Ex man came with a package for my husband. Then the mail man came but didn't bring a dollhouse. Finally, the UPS man (my hero, lol) brought my bungalow kit. I had given up on the kit and decided to start staining the interior doors and trim so I'd be ready.
While I had the stain out I did the floors. These floors don't come with nice wood floors like the other RGT half scale houses. I used a pen and a ruler to make my floor boards. And, you know me, I couldn't resist playing with the furniture to see if the layouts I had in my head would actually work. And they will! Here's the living room - the walls are just leaning. I haven't started construction.
This is the general layout of the kitchen. There are overhead cabinets to hang, too.
The bedroom will be in the middle room in the upper level. I need to trim my rug but everything will fit. The sewing room will be through the door on the right.
To the left of the bedroom is the bathroom. These pieces are plastic ones that I bought from an ebay seller. Each piece was a different shade of cream/white. I painted the tub and toilet to match, stained the cabinet, made the cabinet top look like marble and then added a "glass" bowl sink made from a suction cup. The area under the sink is where the stairs are supposed to come up. I decided not to use the stairs because they take up too much space. This room will have a linoleum type floor so the patched area will be covered.
This is by far the most complicated kit I've ever assembled. The resulting bungalow is going to be awesome but I'm going to have to force myself to take things slowly. So I'm finished for today. I'm planning to read through the instructions again and start fresh tomorrow.
A little pick-me-up
It is negative 7 degrees F here this morning with a wind chill temperature of negative 13. Brrr. I love winter but this is almost too much for me. :) So I'm giving myself a bit of spring with my new blog look. I hope it makes all of you feel just a bit warmer, too.
Back later with a bungalow kit in hand...I hope.
Wednesday, February 9, 2011
A little time for minis - ;-)
Some time ago I made some vintage style metal lawns chairs in one inch scale for a back porch swap. I thought that style would be perfect for the bungalow porch - something a young couple who enjoy older furniture might like. So I got out some thin metal and some heavy wire. This is the chairs just after assembly.
And here are the finished chairs. The olive color will look great on the front porch.
Well, the post office tracking says my bungalow is out for delivery today. The mail man didn't drive up to the house with a package but maybe the box fits in our large mail box. Hubby will bring the mail up after work so I guess I'll see then. (Much as I want to get started on the bungalow, it's really cold today and I can't quite bring myself to walk down the drive, lol.)
Tuesday, February 8, 2011
Thank you!
We appreciate the good wishes. Hubby saw the cardiologist today and his heart is fine. The pain appears to be caused by esophagial spasms. The doctor made some medication changes and we're hopeful that they will help the pain.
Monday, February 7, 2011
Ally's home!
She arrived today. She came with very pale blonde hair and no facial features painted on. I "colored" her hair and gave her eyeballs and eye brows. I also painted the detail on her watch and gave both Ally and Ben wedding bands.
My wood trim strips for the bungalow also arrived today and the house has been shipped. It really might arrive for my birthday.
I'm glad I had all those good things happen today. I spent the afternoon in the ER with hubby who's been having chest pains. About 6 months ago he had a complete cardiac workup but the pains are getting worse. The stress at work has also dramatically increased so that could be a major factor. Anyway, all test results at the hospital today came back in normal range so he got to come home. Tomorrow we'll try to get him an appointment with the cardiologist.
Sunday, February 6, 2011
Wow! Two years already!
I just realized that yesterday was my 2 year blog anniversary. I also hit 240 followers as of yesterday. I think it may be time for another give-away. Watch for upcoming details.
Go Packers!
First, I just had to take some pictures when I got home from church this morning. Big, beautiful, fluffy flakes were falling. This is my favorite shot. You can really see the snow falling.
And, second, this is Super Bowl Sunday and Green Bay is playing. Woo hoo! We're having some friends over to watch the game and it's going to be a fun evening. Hopefully, Green Bay wins so I can give my friend a hard time for cheering for the Steelers. ;-)
Have a wonderful day!
And, second, this is Super Bowl Sunday and Green Bay is playing. Woo hoo! We're having some friends over to watch the game and it's going to be a fun evening. Hopefully, Green Bay wins so I can give my friend a hard time for cheering for the Steelers. ;-)
Have a wonderful day!
Friday, February 4, 2011
Meet Ben and check out his laptop
Thursday, February 3, 2011
Well, I thought it was finished!
By now you all know that I can't leave well enough alone, ;0). The desk just looked like it was missing something...and it was. The drawer over the chair area wasn't there. Now I'm truly happy with it.
It's ordered!
The bungalow kit is now ordered! Meanwhile, I've made some new furniture for it...or for another project if there's no more room. ;) The desk was made entirely from wood pieces in my scrap box. The curved drawers were made from a wooden book cut in half with cardstock drawers and bead handles. I used skinny sticks to make the trim around the base, except for the curves. For those I used cardstock.
The chair posts and legs are made from skinny sticks split down the middle lengthwise. The seat and back were pieces in my scraps and I used a bit of real leather for the seat cushion. I think it turned out really well.
Tuesday, February 1, 2011
The blizzard is here!
Subscribe to:
Posts (Atom)